大家好!這份教學將帶您一步一步建立一個強大的網頁工具。您只需要在一個文字框中輸入指定的格式,它就能自動為您產生 Google 表單、建立後台試算表、整理好檔案,並回傳所有重要連結。最棒的是,完成後您還可以把它部署到 GitHub Pages,擁有一個專屬的漂亮網址!
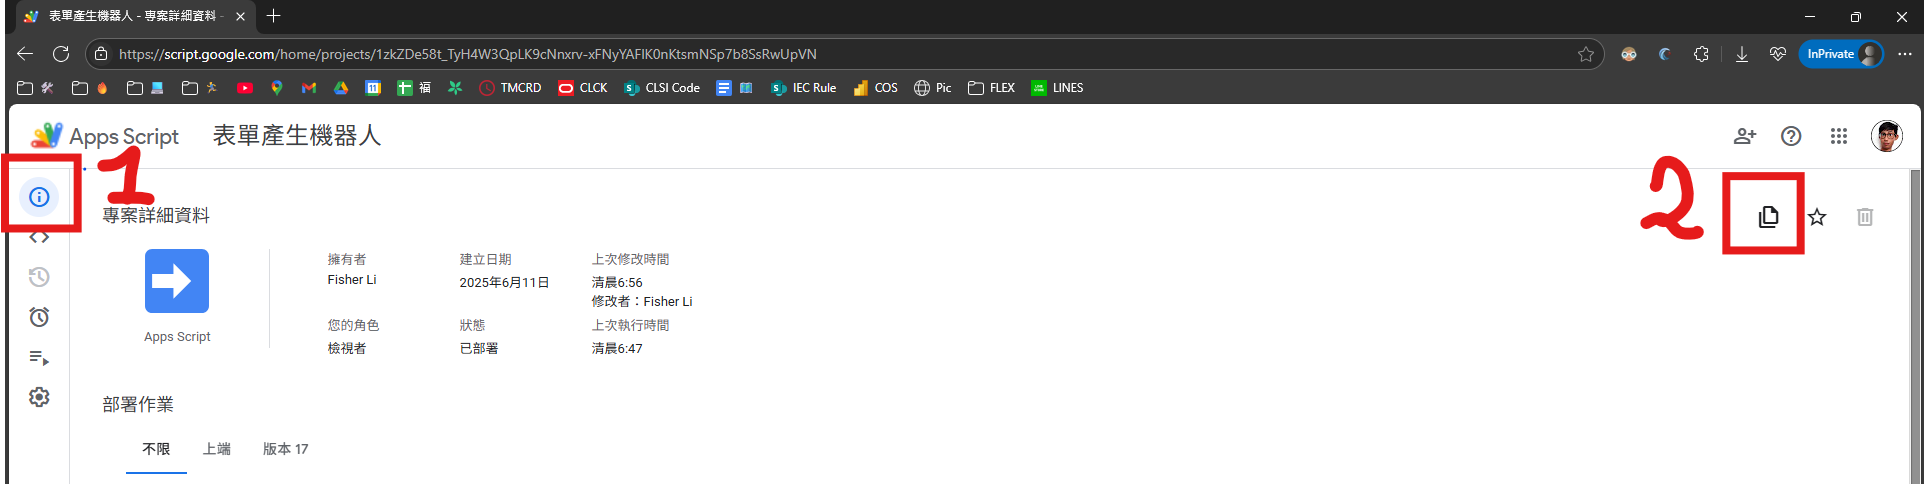
如果不想DIY可以直接拿我的連結使用 📃自動產生表單機器人 另外如果想拿現成的CS Code可以用 這個連結,複製腳本 點擊以下圖片1, 2建立副本
準備好了嗎?我們開始吧!
階段一:建立 Google Apps Script 專案
這是所有魔法的起點。
步驟 1:前往 Google Drive 並建立新專案
- 首先,打開您的 Google 雲端硬碟。
- 點擊左上角的「+ 新增」。
- 滑鼠移到「更多」上,然後選擇「Google Apps Script」。
- 如果找不到? 請點擊「連結更多應用程式」,搜尋
Google Apps Script並將它新增到您的雲端硬碟。
- 如果找不到? 請點擊「連結更多應用程式」,搜尋
步驟 2:為您的專案命名
- 進入 Apps Script 編輯器後,點擊左上角的「未命名的專案」。
- 將它命名為一個您喜歡的名字,例如「表單產生器」。
- 點擊「重新命名」。
階段二:貼上我們的程式碼
接下來,我們要把智慧的大腦和漂亮的外觀放進這個專案裡。專案總共需要三個檔案。
步驟 3:加入後端程式碼 (Code.gs)
這是整個工具的核心邏輯,負責解析文字、建立表單與檔案。
- 在編輯器中,您會看到一個名為
程式碼.gs(或Code.gs) 的檔案。 - 將裡面原有的所有預設程式碼全部刪除。
- 將以下完整的程式碼複製並貼上。
// =================== 後端程式碼 Code.gs ===================

/**
 * 當使用者透過瀏覽器訪問 Web App URL 時,執行此函數。
 */
function doGet(e) {
  return HtmlService.createTemplateFromFile('index')
      .evaluate()
      .setTitle('文字智慧產生表單機器人')
      .addMetaTag('viewport', 'width=device-width, initial-scale=1.0')
      // 這一行至關重要,它允許您的網頁被嵌入到其他網站(例如 GitHub Pages)
      .setXFrameOptionsMode(HtmlService.XFrameOptionsMode.ALLOWALL);
}

/**
 * 從 HTML 檔案中引用 CSS 或 JS 檔案。
 */
function include(filename) {
  return HtmlService.createHtmlOutputFromFile(filename).getContent();
}

/**
 * 輔助函數:取得或建立指定的資料夾。
 */
function getOrCreateFolder(folderName) {
  const folders = DriveApp.getFoldersByName(folderName);
  if (folders.hasNext()) {
    return folders.next();
  } else {
    return DriveApp.createFolder(folderName);
  }
}

/**
 * 接收前端傳來的純文字,解析並建立 Google Form。
 */
function createFormFromText(textInput) {
  try {
    let formTitle = '未命名表單';
    let formDescription = '';
    let questions = [];

    // Regex 驅動的解析引擎
    const questionLineRegex = new RegExp('^(.+?)(?::|:)\\s*((?:簡答|段落|選擇|單選|複選|下拉|下拉選單)(?:\\[.*\\])?|刻度\\d+[-~~]\\d+)\\s*$', 'm');
    let titleStartIndex = textInput.search(/^(?:標題:|標題:)/m);
    let descriptionStartIndex = textInput.search(/^(?:標題簡介:|標題簡介:)/m);
    let questionsStartIndex = textInput.search(questionLineRegex);

    titleStartIndex = titleStartIndex === -1 ? 0 : titleStartIndex;
    descriptionStartIndex = descriptionStartIndex === -1 ? Infinity : descriptionStartIndex;
    questionsStartIndex = questionsStartIndex === -1 ? Infinity : questionsStartIndex;

    const titleEndIndex = Math.min(descriptionStartIndex, questionsStartIndex);
    if (textInput.substring(titleStartIndex, titleEndIndex).trim()) {
        const rawTitleBlock = textInput.substring(titleStartIndex, titleEndIndex);
        formTitle = rawTitleBlock.replace(/^(?:標題:|標題:)/, '').replace(/\n/g, ' ').trim();
    }
    if (descriptionStartIndex < questionsStartIndex) {
        const rawDescriptionBlock = textInput.substring(descriptionStartIndex, questionsStartIndex);
        formDescription = rawDescriptionBlock.replace(/^(?:標題簡介:|標題簡介:)/, '').trim();
    }
    if (questionsStartIndex !== Infinity) {
        const questionsBlock = textInput.substring(questionsStartIndex);
        const questionMatches = questionsBlock.match(new RegExp(questionLineRegex.source, 'gm'));
        if (questionMatches) {
            questionMatches.forEach(line => {
                const match = line.match(questionLineRegex);
                if (match) {
                    questions.push({ title: match[1].trim(), typeInfo: match[2].trim() });
                }
            });
        }
    }

    // 建立 Google Form
    const form = FormApp.create(formTitle);
    form.setDescription(formDescription);
    form.setConfirmationMessage('感謝您的填寫,我們已收到您的回覆!');
    form.setAllowResponseEdits(false);

    // 新增問題
    questions.forEach(q => {
      let item;
      let questionType = q.typeInfo;
      let questionOptions = [];
      const optionMatch = q.typeInfo.match(/^(.+?)\[(.+)\]$/);
      if (optionMatch) {
        questionType = optionMatch[1].trim();
        const optionsString = optionMatch[2];
        questionOptions = optionsString.replace(/,/g, ',').split(',').map(opt => opt.trim()).filter(opt => opt);
      }
      switch (questionType.toLowerCase()) {
        case '選擇': case '單選': item = form.addMultipleChoiceItem(); if (questionOptions.length > 0) item.setChoiceValues(questionOptions); break;
        case '複選': item = form.addCheckboxItem(); if (questionOptions.length > 0) item.setChoiceValues(questionOptions); break;
        case '下拉': case '下拉選單': item = form.addListItem(); if (questionOptions.length > 0) item.setChoiceValues(questionOptions); break;
        case '簡答': item = form.addTextItem(); break;
        case '段落': item = form.addParagraphTextItem(); break;
        default:
          const scaleMatch = questionType.match(/刻度(\d+)[-~~](\d+)/);
          if (scaleMatch) {
            const lower = parseInt(scaleMatch[1], 10);
            const upper = parseInt(scaleMatch[2], 10);
            if (!isNaN(lower) && !isNaN(upper)) { item = form.addScaleItem().setBounds(lower, upper); }
          } else { item = form.addTextItem(); }
          break;
      }
      if (item) {
        if (q.title.endsWith('*')) {
          item.setTitle(q.title.slice(0, -1).trim()).setRequired(true);
        } else {
          item.setTitle(q.title).setRequired(false);
        }
      }
    });

    // 建立試算表並歸檔
    const ss = SpreadsheetApp.create(`(回覆) ${formTitle}`);
    form.setDestination(FormApp.DestinationType.SPREADSHEET, ss.getId());
    const destinationFolder = getOrCreateFolder("報名表單");
    DriveApp.getFileById(form.getId()).moveTo(destinationFolder);
    DriveApp.getFileById(ss.getId()).moveTo(destinationFolder);

    // 回傳結果
    return {
      success: true,
      title: formTitle,
      description: formDescription,
      formUrl: form.getPublishedUrl(),
      editUrl: form.getEditUrl(),
      sheetUrl: ss.getUrl()
    };
  } catch (error) {
    console.error('從文字建立表單時發生錯誤: ' + error.toString());
    return { success: false, message: '建立失敗:' + error.toString() };
  }
}
步驟 4:加入前端介面 (index.html)
這是使用者會看到的網頁畫面。
- 在編輯器左側「檔案」旁邊,點擊 + 號。
- 選擇「HTML」。
- 將檔案命名為
index,然後按 Enter。 - 將新檔案中預設的內容全部刪除。
- 將以下完整的程式碼複製並貼上。
<!-- =================== 前端介面 index.html =================== -->
<!DOCTYPE html>
<html>
  <head>
    <base target="_top">
    <?!= include('styles'); ?>
  </head>
  <body>
    <div class="container">
      <h1>文字智慧產生表單機器人</h1>
      <p>請在下方文字區塊中,依照指定格式貼上您的表單內容,即可一鍵產生!</p>
      <form id="main-form">
        <fieldset>
          <legend>表單內容產生區</legend>
          <textarea id="form-content" rows="15" placeholder="請在此輸入..."></textarea>
          <small>
            <b>提示:</b><br>
            - <b>標題/標題簡介</b>: 可跨行書寫,程式會自動判斷。<br>
            - <b>問題</b>: 一行一個問題,用冒號 (:或 :) 分隔標題與類型。<br>
            - <b>選擇/複選/下拉題</b>:在類型後用方括號 `[]` 包住選項,選項間用逗號 `,` 或 `,` 分隔。<br>
            - <b>刻度題</b>:使用格式,例如 `刻度1~10`。<br>
            - <b>必填題</b>:在問題標題後加上星號 `*`,例如 `姓名*: 簡答`。
          </small>
        </fieldset>
        <button type="submit" id="submit-btn">產生表單並取得連結</button>
      </form>
      <div id="loader" class="hidden">
        <div class="spinner"></div>
        <p>正在為您解析文字並建立表單,請稍候...</p>
      </div>
      <div id="result-container" class="hidden">
        <h2>🎉 建立成功!</h2>
        <p>您的表單資訊如下,請點擊下方按鈕一次複製所有內容。</p>
        <textarea id="result-all-info" rows="8" readonly></textarea>
        <div class="action-area">
          <button onclick="copyAllInfo()">一鍵複製所有資訊</button>
          <span id="copy-feedback" class="hidden">已複製!</span>
        </div>
        <button onclick="resetForm()" class="secondary">建立新表單</button>
      </div>
    </div>
    <script>
      const defaultContent = `標題: 親子相調
標題簡介: 感謝您對本次活動的支持!請填寫以下資訊,期待您的加入。
時間: 下午
地點: 教會
費用: 100元
姓名*: 簡答
聯絡方式*: 簡答
參加時間: 複選[早上,晚上]
小區*: 選擇[1-1,1-2,1-3,1-4,2-1,2-2,2-3,2-4]
參與人數(包含本人): 刻度1~8`;

      document.addEventListener('DOMContentLoaded', function() {
        document.getElementById('form-content').value = defaultContent;
      });

      document.getElementById('main-form').addEventListener('submit', function(e) {
        e.preventDefault();
        const textInput = document.getElementById('form-content').value;
        if (!textInput.trim()) { alert('請輸入表單內容!'); return; }
        document.getElementById('loader').classList.remove('hidden');
        document.getElementById('main-form').classList.add('hidden');
        google.script.run.withSuccessHandler(onSuccess).withFailureHandler(onFailure).createFormFromText(textInput);
      });

      function onSuccess(result) {
        document.getElementById('loader').classList.add('hidden');
        const resultContainer = document.getElementById('result-container');
        if (result.success) {
          const originalInput = document.getElementById('form-content').value;
          const lines = originalInput.split('\n');
          let titleToCopy = result.title;
          let descriptionToCopy = result.description;
          const allInfo = `${titleToCopy}\n${descriptionToCopy}\n\n🔗 報名連結: ${result.formUrl}\n📝 編輯連結: ${result.editUrl}\n📊 後台連結: ${result.sheetUrl}`;
          document.getElementById('result-all-info').value = allInfo;
          resultContainer.classList.remove('hidden');
        } else {
          onFailure({message: result.message});
        }
      }

      function onFailure(error) {
        document.getElementById('loader').classList.add('hidden');
        alert('發生錯誤:' + error.message);
        document.getElementById('main-form').classList.remove('hidden');
      }

      function copyAllInfo() {
        const textarea = document.getElementById('result-all-info');
        textarea.select();
        textarea.setSelectionRange(0, 99999);
        document.execCommand('copy');
        const feedback = document.getElementById('copy-feedback');
        feedback.classList.remove('hidden');
        setTimeout(() => { feedback.classList.add('hidden'); }, 2000);
      }

      function resetForm() {
        document.getElementById('result-container').classList.add('hidden');
        document.getElementById('main-form').classList.remove('hidden');
        document.getElementById('form-content').value = defaultContent;
        document.getElementById('form-content').focus();
      }
    </script>
  </body>
</html>
步驟 5:加入樣式表 (styles.css)
這個檔案負責讓網頁變漂亮。
- 再次點擊「檔案」旁邊的 + 號,選擇「HTML」。
- 將檔案命名為
styles.css(副檔名 .css 很重要),然後按 Enter。 - 將新檔案中預設的內容全部刪除。
- 將以下完整的程式碼複製並貼上。注意:
style標籤是必需的!
<!-- =================== 樣式表 styles.css =================== -->
<style>
  body {
    font-family: -apple-system, BlinkMacSystemFont, "Segoe UI", Roboto, "Helvetica Neue", Arial, sans-serif;
    background-color: #f4f5f7;
    margin: 0;
    padding: 20px;
    color: #172b4d;
  }
  .container {
    max-width: 800px;
    margin: 0 auto;
    background-color: #ffffff;
    padding: 20px 40px;
    border-radius: 8px;
    box-shadow: 0 4px 8px rgba(0,0,0,0.1);
  }
  h1 { color: #0052cc; }
  h2 { color: #0065ff; }
  form { display: flex; flex-direction: column; gap: 20px; }
  fieldset { border: 1px solid #dfe1e6; border-radius: 4px; padding: 20px; }
  legend { font-weight: bold; padding: 0 10px; color: #42526e; }
  label { font-weight: 600; margin-bottom: 5px; display: block; }
  input[type="text"], textarea, select {
    width: 100%;
    padding: 10px;
    border: 1px solid #ccc;
    border-radius: 4px;
    box-sizing: border-box;
    font-size: 1em;
    font-family: inherit;
  }
  small { display: block; margin-top: 10px; color: #5e6c84; line-height: 1.6; }
  button {
    background-color: #0052cc;
    color: white;
    padding: 12px 20px;
    border: none;
    border-radius: 4px;
    cursor: pointer;
    font-size: 1.1em;
    font-weight: bold;
    transition: background-color 0.2s;
  }
  button:hover { background-color: #0065ff; }
  button.secondary { background-color: #f4f5f7; color: #42526e; border: 1px solid #dfe1e6; font-weight: normal; }
  button.secondary:hover { background-color: #e9ecef; }
  .hidden { display: none; }
  #loader { text-align: center; padding: 40px 0; }
  .spinner {
    border: 6px solid #f3f3f3;
    border-top: 6px solid #0052cc;
    border-radius: 50%;
    width: 50px;
    height: 50px;
    animation: spin 1s linear infinite;
    margin: 0 auto 20px;
  }
  @keyframes spin { 0% { transform: rotate(0deg); } 100% { transform: rotate(360deg); } }
  #result-container { padding: 20px; background-color: #e6f7ff; border: 1px solid #91d5ff; border-radius: 4px; }
  #result-container textarea {
    width: 100%; box-sizing: border-box; padding: 10px; border: 1px solid #ccc;
    border-radius: 4px; font-size: 1em; line-height: 1.6; background-color: #fafbfc;
    margin-bottom: 15px; resize: vertical;
  }
  .action-area { display: flex; align-items: center; gap: 15px; margin-bottom: 20px; }
  .action-area button { font-size: 1.1em; padding: 12px 20px; }
  #copy-feedback { color: #00875a; font-weight: bold; transition: opacity 0.3s; }
  #copy-feedback.hidden { opacity: 0; }
  #result-container button.secondary { align-self: flex-start; }
</style>
做完這一步,您的專案應該有 Code.gs, index.html, styles.css 三個檔案。請務必點擊上方的儲存專案圖示!
階段三:部署與授權
這是最關鍵的一步,我們要讓這個專案變成一個可以公開訪問的網站。
步驟 6:部署為網頁應用程式
- 點擊編輯器右上角的藍色「部署」按鈕。
- 選擇「新增部署作業」。
- 在跳出的視窗中,點擊「選取類型」旁邊的齒輪 ⚙️ 圖示,然後選擇「網頁應用程式」。
- 接著,請務必依照以下設定填寫:
- 說明:(選填) 輸入「表單產生器 v1」。
- 執行身分:選擇「我」。(代表程式用 您的 權限去建立表單)
- 誰可以存取:選擇「任何人」。(這樣才能讓所有人,包括您自己,訪問這個網頁)
- 點擊「部署」。
步驟 7:授權程式存取您的 Google 服務
首次部署時,Google 會要求您授權。別擔心,這是正常的安全步驟。
- 點擊「授權存取」。
- 在跳出的視窗中,選擇您自己的 Google 帳戶。
- 您會看到一個「Google 尚未驗證這個應用程式」的警告畫面。這是正常的,因為這是您自己寫的程式。請點擊左下角的「進階」。
- 接著點擊「前往「(您的專案名稱)」(不安全)」。
- 最後,您會看到程式要求的權限列表(例如:存取您的雲端硬碟、Google 表單等)。請點擊右下角的「允許」。
步驟 8:取得您的網頁應用程式網址!
授權成功後,您會看到一個新的視窗,裡面有一個「網頁應用程式」的網址,它以 .../exec 結尾。
🎉 恭喜您!這個網址就是您的工具的入口!
請將它複製下來,貼到瀏覽器中打開,您應該就能看到您親手打造的漂亮介面了。試著點擊「產生表單並取得連結」看看效果吧!
階段四 (選修):將您的工具放到 GitHub Pages
想擁有一個更專業、更簡短的網址嗎?(例如 your-name.github.io/form-generator),跟著以下步驟做。
步驟 9:準備 iframe 嵌入頁面
- 在您的電腦上,建立一個新的文字檔案,將它命名為
index.html。 - 將以下完整的程式碼複製並貼到這個檔案中。
<!DOCTYPE html>
<html lang="zh-Hant">
<head>
  <meta charset="UTF-8">
  <meta name="viewport" content="width=device-width, initial-scale=1.0">
  <title>表單自動產生器</title>
  <style>
    html, body { margin: 0; padding: 0; height: 100%; overflow: hidden; background-color: #f4f5f7; font-family: sans-serif; }
    #app-frame { width: 100%; height: 100%; border: none; display: none; }
    #loader { display: flex; justify-content: center; align-items: center; flex-direction: column; height: 100%; gap: 20px; }
    .spinner { border: 6px solid #e0e0e0; border-top: 6px solid #0052cc; border-radius: 50%; width: 50px; height: 50px; animation: spin 1.5s linear infinite; }
    @keyframes spin { 0% { transform: rotate(0deg); } 100% { transform: rotate(360deg); } }
  </style>
</head>
<body>
  <div id="loader">
    <div class="spinner"></div>
    <p>應用程式載入中,請稍候...</p>
  </div>
  <!-- ▼▼▼▼▼ 請將 src 中的網址替換成您在步驟 8 取得的 GAS 網址 ▼▼▼▼▼ -->
  <iframe id="app-frame" src="https://script.google.com/macros/s/xxxxxxxxxxxxxxxxxxxxxxxxxxxxx/exec" onload="showContent()"></iframe>
  <!-- ▲▲▲▲▲ 請將 src 中的網址替換成您在步驟 8 取得的 GAS 網址 ▲▲▲▲▲ -->
  <script>
    function showContent() {
      document.getElementById('loader').style.display = 'none';
      document.getElementById('app-frame').style.display = 'block';
    }
  </script>
</body>
</html>- 最重要的一步:將上面程式碼中
src="..."裡面的網址,替換成您在步驟 8 複製的那個.../exec網址。 - 儲存這個
index.html檔案。
步驟 10:部署到 GitHub
- 前往 GitHub 並登入您的帳戶。
- 建立一個新的公開 (Public) 倉庫 (Repository),例如命名為
form-generator。 - 進入新倉庫的頁面,點擊「Add file」>「Upload files」。
- 將您剛剛編輯好的
index.html檔案拖曳上傳。 - 點擊頁面下方的「Commit changes」。
- 上傳成功後,點擊倉庫上方的「Settings」分頁。
- 在左側選單中,點擊「Pages」。
- 在「Branch」部分,將來源從
None改為main(或master),然後點擊「Save」。 - 稍等一兩分鐘,頁面會顯示一個綠色提示框,裡面就是您的 GitHub Pages 網址!
大功告成! 您現在擁有一個功能完整、介面美觀、網址專業的個人工具了。快去分享給朋友們炫耀一下吧!